Making life easier !

Support - Invoicing

Tutorial

How to create an invoice?

On the left side navigation menu click on “invoices”
Click on “New invoice” green button
  • Choose a contact, or add a new one
  • Enter invoice date and payment deadline date.Fill in each invoice line with the item name, description, price, VAT and quantity. By default item prices are VAT incl. If you want to enter Tax excluded prices, check the ‘Net prices’ checkbox.
  • When you type in the product name, Fiduly searches the list of your already defined products for a product with the same name and offers it to you.
  • As you enter the information you can see the evolution of the invoice in PDF at the bottom.
  • Click on “Save” for a simple save as a draft or “Save and send” to send the invoice by email. A window appears to enter the text of your email.
If you choose to send your invoice by other means (Post for example) you can go to the page of this invoice and download the PDF to print it and send it by post. You must then mark the invoice as sent manually by clicking on the “Airplane” icon (see below):

How do I configure my invoicing?

On the left hand navigation menu, choose “Settings” then click on the “Invoicing” tab.
You can enter the default values for your new invoices and choose a standard template for customizing your invoices (Modern, with cover page and Formal).
By clicking on “Email settings”, you can configure the content of the email that will accompany your invoice. The email appears as sent from your email address.
Repeat the same operation for the default values of your reminders.

How to send a payment reminder?

In the navigation menu, go to “My Business”, then choose the “Invoices” tab.
The list of invoices is displayed. If the due date (reminder date) has passed, it is displayed in red.
Select the overdue invoice (s), by checking the line and select the email icon (in green) to send a reminder invoice by email. A dialog box appears to confirm or cancel the sending.
If the payment date is passed, the invoice will be sent with a reminder and the invoice status will change to ‘Payment reminder’ There are three levels of callbacks in Fiduly:
  • Friendly reminder
  • 2nd reminder
  • Final reminder
To move from one level to the next, press the ‘Movee to the next step in the reminder process’ button. You can also edit the invoice at any time to change status and generate the corresponding reminder letter.

How to configure a payment slip?

ATTENTION: BVRs are no longer accepted from September 30, 2022. Please use the QR-code. In the navigation menu, go to “Settings”, then choose the “ESR/ BESR” tab.
Fill in the “default values”, check the “Add ESR/BESR payment slip to invoices” button so that the ESR is generated by default in the invoice and save with the green button.

How to add an payment slip to an invoice?

ATTENTION: BVRs are no longer accepted from September 30, 2022. Please use the QR-code. The ESR is by default attached to the invoice. (see the question “how to configure a payment slip”). If it is not, check the “Add ESR / BESR” box when you issue a new invoice.

How to configure a QR-Bill invoice?

In the navigation menu, go to “Settings”, then choose the “QR-Bill” tab.
Choose the bank account that you must have already created in Fiduly: There are two types of QR-Bill invoices supported by Fiduly.
  1. The first just requires you to have an IBAN and uses a reference
  2. The second, which will allow you to use 27-digit QR references as for payment slips, requires you to request a QR-IBAN (not to be confused with classic IBAN) from your bank.
Check the button “Add QR bill payment slip to invoices” so that the QR-Code is by default generated in the invoice and save with the green button.

How to add a QR code to an invoice?

The QR-Code is by default attached to the invoice if it has been configured. (see the question “How to configure a QR-Bill Invoice?”). If it is not, check the “QR-Bill” box when you issue a new invoice. You can add either an ESR or a QR-Code.

How to generate subscription invoices?

If you need to invoice a customer on a regular basis, for a service subscription for example, you can use the Recurring Sales module to define an invoice (or order) template and a frequency (daily, monthly, weekly or yearly) . Fiduly will generate the invoices at the defined frequency.
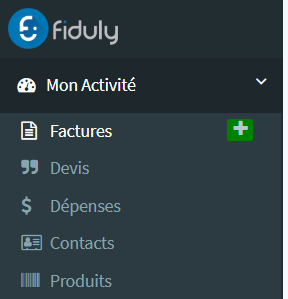
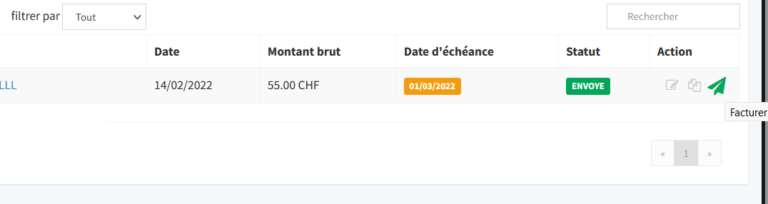
In the navigation menu, go to “My activity”, then choose the “Recurring sales” tab, by clicking on the green button. Fill in the type of document (invoice or order) that you want to be generated and the frequency.
You can customize certain fields in the generated documents, in particular the description of the articles and the texts before and after the list of articles. To do this, use the following symbols:

$DATE document date ex. 3/12/2022 $DAYOFMONTH day of month (1 to 31) $MONTH month name ex. January $YEAR year of document date ex. 2022 $DAY jour de la semaine ex. Lundi

You can add or subtract a number to these symbols (without space). ex. $YEAR+1 $MONTH+3 or $DAY-1
Some examples for a document generated on 1/1/2022:

Subscription $MONTH to $MONTH+3 $YEAR —-> Subscription January to March 2022 Order from $DAY $DATE, processed on $DAY+1 $DATE+1 —-> Order from Saturday 1/1/2022, processed on Sunday 2/1/2022 Bi-annual subscription $YEAR to $YEAR+1 —-> Bi-annual subscription 2022 to 2023

How to create an invoice from a quote or an order?

From the list of quotes/orders, in the “Action” column, press the “Invoice” icon, you will be redirected to the invoice creation page with the quote/order data pre-filled. You can then make any changes and save the invoice.
Otherwise, you can also, from the “Quote” page, press the “Invoice” icon.
Or, for orders, from the “Order” page, press the “Invoice” icon

How to edit invoice and quote references?

Fiduly generates a unique invoice and quote number that increments from one document to another. This number is displayed by default on documents as a reference to communicate to customers. If you want to use your own references on documents, it is possible! To do this, go to “Settings” and choose the “Invoicing” tab. Next, check the box “Use your own invoice reference”. Press “Update”
Now, when you edit an invoice or a quote, a new field “Invoice reference” or “Quote reference” appears and allows you to modify the reference that you communicate to your customers on the documents (instead of the number generated by the software). This does not affect the software’s ability to automatically recognize bill payments in your bank statements.