Complete the expense and choose the account on which to post each item in the invoice.
Choose the VAT on each item. There are 2 types of VAT IPI (investment) and IPM (standard). As a general rule if the expense count starts with 4, choose IPM, otherwise choose IPI.
Fiduly automatically calculates the amount of VAT. Then enter the price of the item. By default the price must be entered including VAT. You can choose to enter the net price (excluding VAT) by checking the “Net prices” checkbox.
Then download a copy, pdf or a scan of the invoice / fact sheet for archiving. The document appears at the bottom of the page to make it easier for you to copy the values.
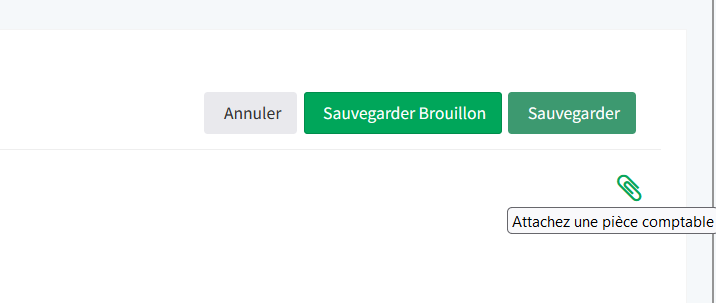
Save.
Whether it’s an expense report or an expense paid on purchase. Click on “This is an expense report (paid on purchase)” and choose the account with which you paid the invoice (“Cash – till” or “Credit card”). If you have advanced this payment to your company, then choose the “Debt to shareholder” account.
Create a supplier invoice
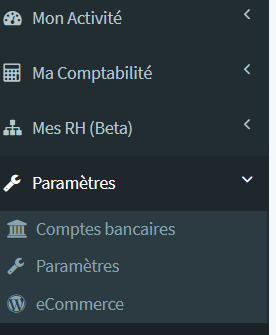
In the navigation menu, choose “Expenses”.
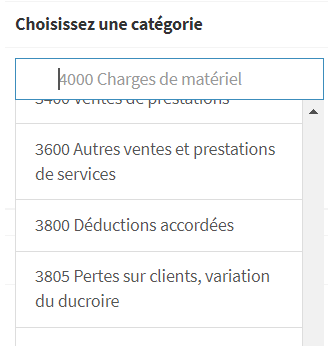
Fill out the invoice and choose the type of expense in the “choose a category” menu.
Add an accounting document and save.
Configure your expenses
Fiduly offers you to abstract the accounting chart by defining more user-friendly expense categories and links them to corresponding account in the chart. Thus, when you enter your expenses, you will have more “readable” categories than on an accounting plan.
Choose “Parameters” in the Navigation menu then select the “Expenses” tab
To the question “Would you like to use more user-friendly expense categories?” », Click on yes.
And choose the corresponding expenses.
Click on “Save” to save your preferences.
How to attach an accounting document to an expense?
When you edit an expense such as an expense report or a supplier invoice, you can attach an accounting document such as a pdf document, a scan or a photo.
To do this, press the paper clip icon
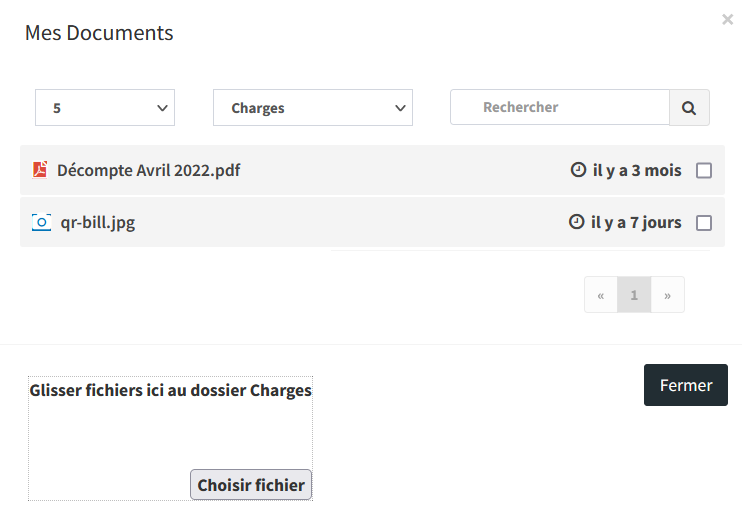
A new window will appears and allows you either to choose a file from those in your document vault, or to upload a new file.
On mobile phones and tablets, by pressing “choose file”, your device offers you the option to take a photo, or to choose from existing photos in your albums.
you can attach multiple files.
How do I scan a document and upload it to my safe?
Fiduly integrates perfectly with various scanning apps on iPhone and Android. We recommend the following app:
With this application, you can scan documents and send them to your Fiduly safe via e-mail as attachments.
To enable this feature, go to “Settings” / “Team Access”, scroll down to “Upload documents via email”
Choose a name for your download email.
Press “Save and activate”
The title of the email allows you to specify the folder in which the file will be saved. If the folder name is not recognized in the title, the file will go to the “uncategorized” folder.
If you mark “expense” in the title of the email, a draft new expense will be created from the content of this file.